Showing posts with label tutorial. Show all posts

Thursday, 14 January 2016

Folder d.i.y./ Segregator

We have started our Advent diary without plans for place in which it will be kept, I mean, will we use a box, a folder or something else? Folder seemed to be the best idea, but I had none suitable for such small pages. The only one I had at home was a very old grey ring binder, so I had to re-make it.

Nasz Adwentownik zaczęliśmy robić  bez pomysłu na jego “opakowanie”. Nie pomyślałam czy będzie on przechowywany w segregatorze, pudełku, kopercie itp. Segregator okazał się najlepszym posmysłem gdy stos zapisków stawał się coraz większy. W domu nie mialam nic poza starym, szarym segregatorem biurowym, zdecydowanie za dużym do naszych karteczek. Trzeba go było więc przerobić.   


With a kitchen knife I cut it to the size somewhat larger than the pages. Scissors were not strong enough for this task (if you have a small saw, it will be perfect for this job). Then I glued decorative paper on the outside of the folder leaving some allowance for folding.

Nożem kuchennym przycięłam go do wymiarów ciut większych niż kartki pamiętnika. Nożyczki nie były wystarczająco mocne do tego zadania, natomiast mała piła do drewna sprawdziłaby się doskonale.Następnie nakleiłam kolorowy papier na zewnętrzną stronę segregatora. Zostawiłam sprory zapas na zawinięcie. 


Then I glued a paper on the back of the folder. This should be done on closed folder. If you do it when the folder is open, the paper will tear when you will try to close the folder.


Potem przykleiłam papier do grzbietu segregatora. Trzeba to robić koniecznie gdy segregator jest zamknięty. Gdybście to zrobili na otwartym segregatorze to po wyschnięciu papier popękałby na zgięciach. 


At the end I added decorative paper inside the folder and after cutting the excess of paper on the openings (I did not do this job very well) the folder was ready to be filled with our pages.


Na koniec wykleiłam środek ozdobnym papierem, wycięłam papier z otworów (tutaj się nie popisałam starannością...) i segregator był gotowy by go wypełnić naszymi zapiskami. 


Tuesday, 17 November 2015

Crafty SUPERSTAR!

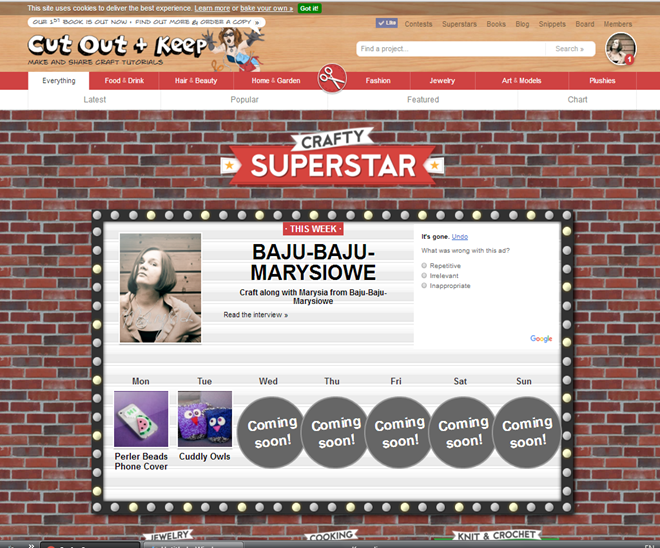
Hi guys, I just wanted to share with you that this week I am a Crafty SUPERSTAR at Cut Out + Keep. This means that each day one of my projects will be featured on their website. If you want to check these projects just click on the picture below.

Witam serdecznie! Chciałam się Wam dziś pochwalić, że w tym tygodniu jestem kraftową Super Gwiazdą na portalu Cut Out + Keep. Każdego dnia tego tygodnia jeden z moich kursów będzie publikowany na ich stronie. Jeśli jesteście ciekawi to zapraszam do kliknięcia w obrazek.

image

Sunday, 8 November 2015

Hagelslag

Hagel slag-0311Hagel slag-0327-2

Have you already heard that according to UNICEF Dutch children are the happiest in the world? There are many reasons: relaxed parents, general wealth, no homework in the primary school, etc. I think that one of the reasons is also hagelslag. It is a type of (mostly chocolate) sprinkles that in other countries are used to decorate desserts but here, in the Netherlands, people use it as a sandwich topping. Kids are allowed to have it for the breakfast quite frequently and quite some of them on a daily basis. My kids are very Dutch and they love hagelslag (honestly every kid in the world would!). I was always trying to minimize their contact with this delicacy but since they spend more time at home alone, the consumption of hagelslag increased drastically at hour household.

I must admit that it is also my guilty pleasure. What is yours?

The lettering on the jar with hagelslag I made with the white glass pen from Edding. A while ago Jagna made a short d.i.y. film about how to decorate a tea light holder with this pen. You can see this video below.

Hagel slag-0315Hagel slag-0317

Czy słyszeliście o tym, że wedłóg UNICEFu holenderskie dzieci są najszczęśliwszymi dziećmi na świecie? Powodów do tego jest dużo, między innymi bardzo zrelaksowani rodzice, generalny dobrobyt, brak zadań domowych w szkole podstawowej, generalnie mniej stresu w szkole itp, itd. Nie zdziwiło by mnie gdyby jednym z powodów był też prawie nieograniczony dostęp do hagelslag. To taki rodzaj kolorowej posypki, którą w Polsce używa się zwykle do tortów a tutaj jest powszechnie używana do kanapek na śniadanie. Moje dzieci są bardzo holenderskie i uwielbiają czekoladowe hagelslag (zresztą jakie dziecko by tego nie lubiło). Zwykle ograniczałam im nieco spożycie tego przysmaku, choć zawsze mieliśmy go w domu. Odkąd przestali chodzić do świetlicy szkolnej to spożycie hagelslag wzrosło u nas drastycznie (zajadają sie nim gdy nas nie ma w domu).

Przyznam, że od czasu do czasu też lubię zjeść bułeczkę z hagelslag…

Gdyby ktoś był ciekawy to napiś na słoiku zrobiłam białym markerem do szkła firmy Edding.

Jakiś czas temu Jagna zrobiła filmik na którym pokazuje jak takim markerem można ozdobić świecznik, zapraszam do obejrzenia.

Do następnego razu!

Hagel slag-0313Hagel slag-0321

Friday, 29 May 2015

Charity cupcakes/ Charytatywne babeczki

IMG_9022_thumb3IMG_9010_thumb3


Wojtek is collecting money for charity. Last weekend together with Jagna they baked vanilla cupcakes with chocolate topping and sold them in the neighbourhood to collect some money. They also took a video of the process. Enjoy and give them a thumb up!


IMG_9019_thumb2IMG_9021_thumb2
Wojtek w ramach przygotowania do pierwszej Komunii zbiera pieniądze na cel charytatywny. W zeszły weekend postanowili z Jagna upiec babeczki waniliowe z polewą czekoladową i sprzedać je by zarobić pieniądze na Wojtkowy cel charytatywny. Zrobili też filmik z przepisem na te babeczki.

IMG_9008_thumb1

Wednesday, 13 May 2015

Floral headband d.i.y. by Jagna/ Kursik Jagny na opaskę z kwiatkami

My girl make her second d.i.y. video in which she shows how to make a (boho) floral headband. I like it so much! The video is quite long (12 min) but check the bloopers that start at 10:33. Give her a thumb up if you like her work!

11220819_897054070351447_8587997751532121942_n11233600_897054073684780_1672492672441457082_o (1)

Moja córeczka stworzyła swój drugi już filmik. W tym pokazuje jak zrobić opaskę/kwietny wianek na głowę. Wideo jest dosyć długie, ale nie przegapcie bloopersów, które zaczynają się od 10:33. Polubcie ten filmik jeśli się Wam spodoba (mimo, że język jest niezrozumiały).

Friday, 1 May 2015

Freckled apple/ Piegowate jabłuszko

My daughter Jagna just started her own Youtube channel called “Appeltje met sproetjes”, which in Dutch means “freckled apple”. Jagna loves apples and has freckles. She just uploaded her very first d.i.y. video with a Mother’s day greeting card. Give her a thumb up even if you do not understand what she is talking about :) Just for encouragement. Thanks!

Moja córeczka właśnie założyła sobie własny kanał na Youtube zatytułowany „Appeltje met sproetjes” co po holendersku oznacza „Piegowate jabłuszko”. Jagna uwielbia jabłka i jest piegowata. W jej pierwszym filmiku pokazuje jak zrobić kartkę na dzień matki. Kliknijcie jej na kciuka do góry nawet jeśli nie rozumiecie o czym mówi; tak dla zachęty! Z góry dziękuję!

Tuesday, 17 February 2015

Lotion bars (a review of a d.i.y. beginner)

IMG_8066IMG_8059

After making the lip balm I really wanted to make something else. I started to look up recipes for hand crème as my hands get easily dry and I have problem with my cuticles. After typing “hand crème diy” in Pinterest I got some pages with hand lotion bars. I got really intrigued by this. They seemed very easy to be made so I decided to give them a chance.

Indeed, it is very simple to make them. I made the first batch with unrefined shea butter and I must admit I was very disappointed with the scent despite the addition of sweet orange oil. So I meted this batch and added more sweet orange oil and lavender oil and some lavender but I still could smell the shea butter. Shea butter is really great when it goes about hydration but the scent of unrefined butter is something I can not bear. For me it smell as rotten milk but a friend of mine said that she liked the scent of my bars so perhaps is just a matter of personal preferences.

The second batch I made replacing shea butter with cacao butter and I loved it scent. It is really nice.

IMG_8056IMG_8062

BUT, in all posts I have read about lotion bars authors claimed that they (bars) changed their life and they (bloggers) will never ever return to commercial hand creams. Well, I must admit that my hands are softer after using these bars and my cuticles really improved. On the other hand, I need to say that the way of application is not really easy. It takes a while before bars melt, and it takes really long when you have cold hands, which is my problem. So to apply this cosmetics I need to first worm up my hands (on a cup of tea, for instance). Secondly, it takes a while until hands are not more oily. It is not something I can use at office just as I did with my Dove cream. But the hydrating effects lasts longer than this of my Dove. And I know what I am putting on my skin! Perhaps I should make a real hand cream instead of bars. I think I will experiment with this a bit. Once I learn more I will share my thoughts. For now I share some photos of my mini bars.

IMG_8067IMG_8055

P.S. To be honest, I really regret that I do not have anyone close by (a friend, not just anybody) that could experiment a bit with me.

Thursday, 5 February 2015

D.I.Y. lip balm/ Balsam do ust własnej roboty

For quite some time I was thinking about making own beauty products. In the secondary school I used to make some toners and cleansers but then I stopped. Last week I made my first step by making own lip balm. It was a bit intimidating in the beginning but believe me, it is very simple. I melted two teaspoons of cacao butter with one ts beeswax and four ts sweet almond oil in a water batch. After I remove it from the water batch I added four drops of orange essential oil. Then I distributed it into containers. If you want to try, remember that it solidifies very fast.

It tastes different that balms I used to buy (my kids says that it is tasty) but it is very hydrating and feels very soft. And most of all I know what is in it and what is not (no toxic additions like colors, conservants etc.). A colleague of mine who got it from me liked it a lot.

IMG_8051IMG_8052

Od jakiegoś czasu miałam ochotę by zrobić sobie kosmetyki domowym sposobem. W czasach szkoły średniej zdarzało mi się zrobić jakiś tonik czy preparat do mycia twarzy, ale potem jakoś skończyłam. W zeszły weekend poczyniłam pierwszy krok i zrobiłam sobie balsam do ust. Początkowo trochę się bałam, ale okazało się to bardzo proste. Trzeba było jedynie stopić ze sobą dwie łyżeczki masła kakaowego z jedną łyżeczką wosku pszczelego i czterema łyżeczkami oleju ze słodkich migdałów w kąpieli wodnej. Po ściągnięciu tej mieszanki z kąpieli dodałam cztery krople olejku z pomarańczy i po zmieszaniu przelałam do pojemniczków. Jeśli chcielibyście spróbować to uważajcie bo ten balsam bardzo szybko zastyga więc trzeba się śpieszyć.

Ten balsam działa nawilżająco i zmiękczająco na usta. Smakuje inaczej niż balsam ze sklepu, moje dzieci mówią, że im smakuje. Najważniejsze jest to, że wiem co w nim jest i czego w nim nie ma (toksyn, mających przedłużyć mu świeżość, poprawić smak lub kolor). Koleżanka z pracy, której podarowałam słoiczek była nim zachwycona.

Sunday, 5 October 2014

Cuddly owls/ Sowy Przytulanki

IMG_6787

These two cute cuddly owls were created in just one day. I used quite thick yarn and knitting needles size 7, but if you use somewhat thinner yarn then it may take more time to make them. If you want to know how to make these cuties read further.

I’m very curious which one you find nicer. Personally, I like more  the bigger one, but both my kids think the smaller one is nicer.

Te dwie słodkie sówki przytulanki powstały w ciągu jednego dnia. Zrobiłam je z grubej włóczki i na drutach nr 7; oczywiście jeśli użyje się cieńszej włóczki to dziergania będzie więcej.

Jeśli chcesz się dowiedzieć jak je zrobić to czytaj dalej; jeśli nie chcesz, to nie czytaj ;)

Ciekawa jestem, która Wam się bardziej podoba. Mnie osobiście bardziej ta duża przypadła do gustu, a moim dzieciom zdecydowanie ta mniejsza.

IMG_6774IMG_6778

Supplies: yarn, knitting needles (or a knitting loom), felt/fabrics, buttons, embroidery floss, needles, scissors, stuffing.

Potrzebne będą: włóczka, druty (albo krosna do dziergania), filc/materiał, guziki, kordonek, igły, nożyczki, coś do wypychania.

IMG_6726

Choose the size you like and knit a cylinder (optionally, make a rectangle of which two edges you stich to make a cylinder).

Wydziergaj komin w wielkości sowy, ewentualnie możesz wydziergać kwadrat a potem zszyć go z jednej strony.

IMG_6686IMG_6693

Do not close the top stiches but drag the yarn through them. Then pull the yarn and close the opening on the wrong side. My yarn was so thick that the opening did not close completely after pulling the yarn so I stitched it on the wrong side. This will be the bottom of your owl.

Nie zamykaj oczek, ale przeciągnij przez nie włóczkę, a potem pociągnij ją tak by zamknąć robótkę. Moja włóczka była na tyle gruba, że otwór się nie zamknął, dlatego zaszyłam go od wewnętrznej strony. To będzie dół sowy.

IMG_6706IMG_6717

At this stage add the eyes and the beak (you may add wings as well).

Teraz przyszyj oczy i dziób (możesz też doszyć skrzydła).

IMG_6728IMG_6734

Now stich the top of your owl with an overcast stich. Remember to stitch dense in order to maximally stretch the top of the owl. Leave a small opening for stuffing. Once the owl is stuffed, close it. Add small tassels on both sides and voila, your owl was born!

Teraz zszyj górę szwem na okrętkę. Pamiętaj by szyć dosyć gęsto by jak najbardziej rozciągnąć dzianinę. Zostaw mały otwór, przez który wypchasz sowę a potem go zaszyj. Dodaj małe frędzelki po bokach. I tak oto Twoja sowa jest gotowa!

IMG_6743IMG_6795IMG_6761IMG_6749